Friday, April 28, 2017

Baltimore Album Progress...

I made a big decision after releasing the finishing instructions for the Baltimore Album BOM... 

Stitching the gridded border back and forth on my sewing machine got my rotator cuff all aggravated again, and a survey of my friends concluded that the piece needed fancier border.

So I ripped off my borders and started over... digitizing them!


That was a couple of months ago, and while not quite finished, I've made a ton of progress and it looks amazing...


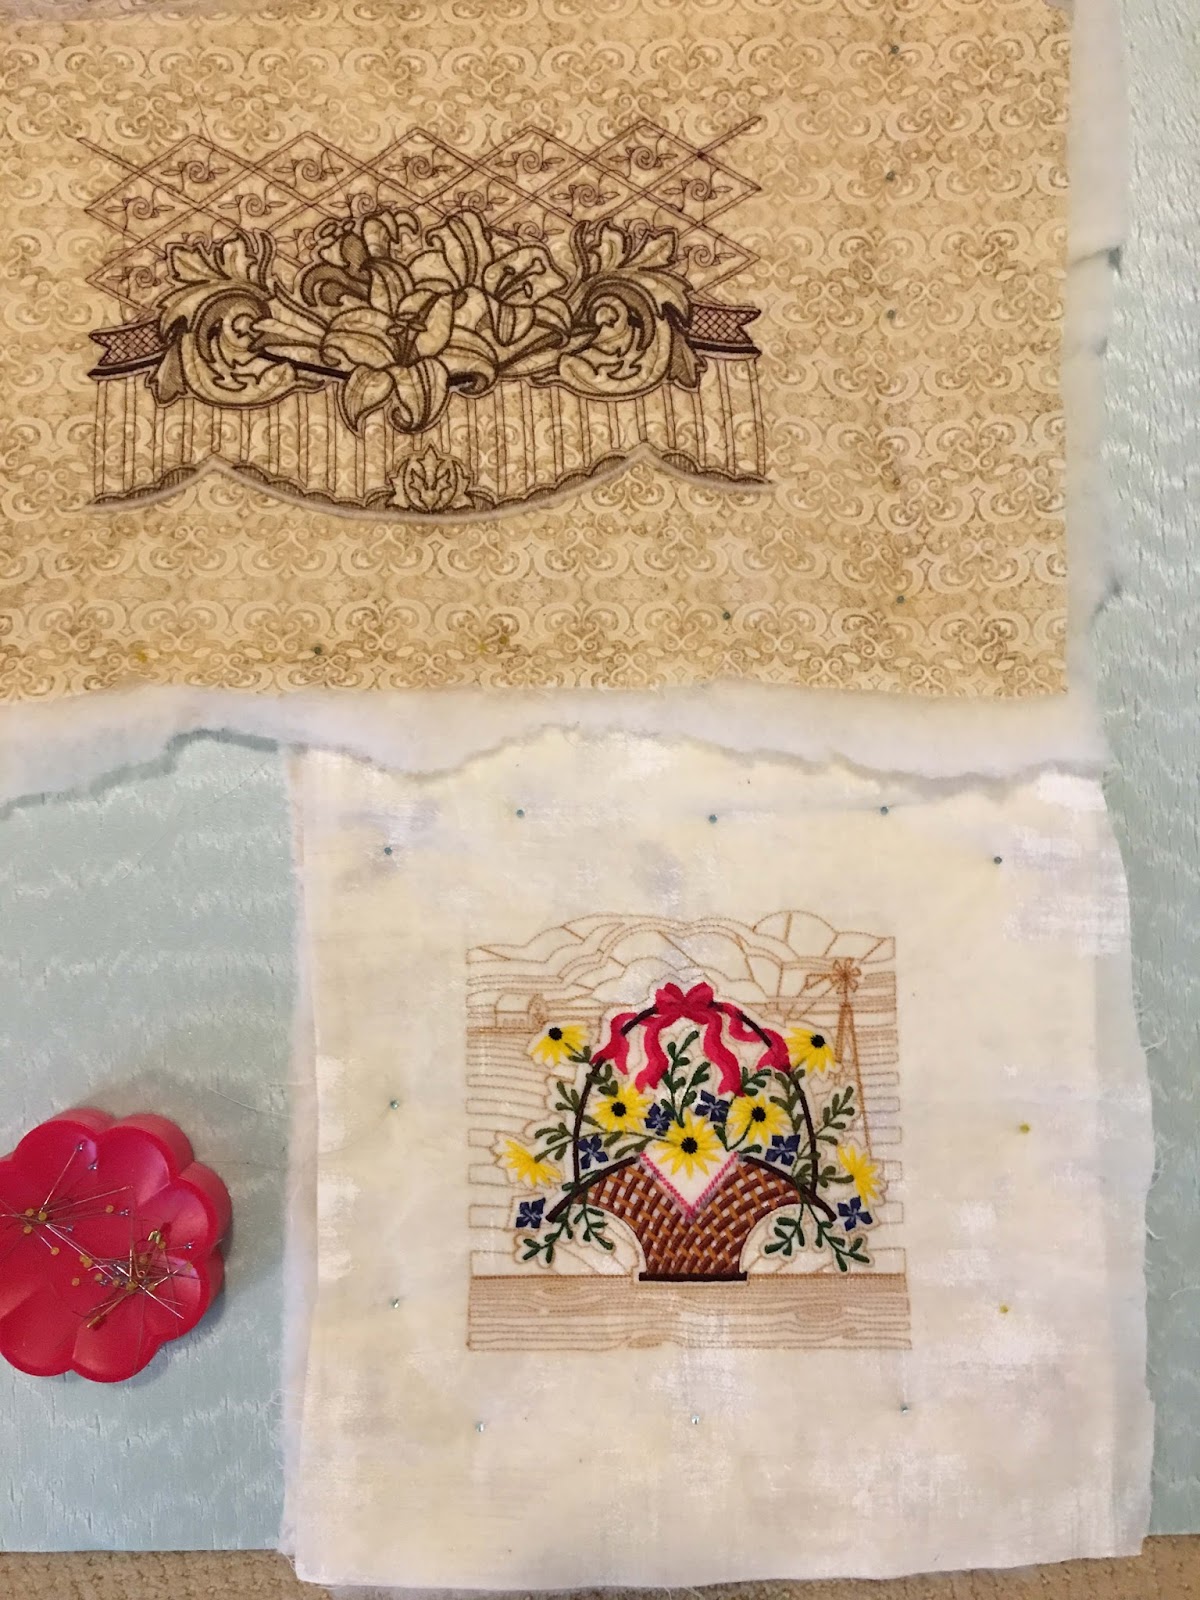
First, the digitizing was ALOT of work! I took my lily and acanthus theme from the inside sashings and expanded on it. The nice thing about working on the computer is that I can actually compose the entire border to the exact size, and even add photos of the existing piece, so you'd think there'd be no surprises when it came to stitching!
 Each piece is designed for the limits of a 7" x 12" hoop and then takes approximately three hours to stitch out... most of this is working to align the sections.

This is the back and you can see how pretty it looks. I have actually gotten to be even BETTER at hooping... problem is, the parts that are already stitched out shrink down, so each successive piece has to be resized to photographs of adjacent pieces. 

I know there are others who use significant machine embroidery in their quilts, but I honestly feel that what I am doing in hooping and entirely machine embroidering this quilt is totally maverick. At least I don't remember seeing any class offered for this! So the learning curve has been a bit steep. Matching points below!


With that said, there is some comforting similarity with the process of quilting. For instance, you can bury all of your thread tails just as you would on any other piece.

Or as I thought, any crazy, obsessive thing a longarmer can do on a show quilt, a machine embroiderer can do better! Beyond that, some strategically placed crystals will help where they have to.

On a side note-- these two items look very similar but actually have a VERY different effect when used on fabric... ask me how I know. One of them has been BANNED from my sewing room, BANNED from my house!!!

Other than that, the possibility of the EPIC FAIL we artists know and fear, at this point is pretty small-- all I would have to do is take off a border and replace it if things went badly. Not that I want to do that, but it's a comforting thought, every time I press the START button on the ol' Babylock!

The end is near, and I'm really pleased with how flat this thing has remained. The reality is that every stitching project will look better after it is washed and blocked. So I tested some extra stitch outs, and the good news is, in spite of all the different threads and colors I used...no bleeding! My good friend Tere D'Amato offered to help me with some hand holding when that day comes. XOX

So without further ado...
Here's "A New England Album"!


The borders are so very large because my hoop needs all that to grip on to-- they will ultimately be trimmed to the scallop shape. Economy of materials was never a hallmark of my process!
I have the top border to go which will hopefully be done this weekend. Then binding... and then it's off to the Vermont Quilt Festival!

While everyone hopes for a ribbon, with all the amazing gorgeous quilts out there, it doesn't often happen... I am just over the moon, first of all, to be this close to finishing this, and second, I think I've created a totally new look of my own, in spite of the variety of quilts that are already out there. That may sound egotistical, but remember-- I may be the only one crazy enough to do this!

Thanks so much for reading, and I hope it encourages you to do whatever crazy thing you like to do-- nothing is better to me than when everyone is doing their thing. Go forth and sew!

XOX

Tuesday, April 25, 2017

How to make flowers in thread...


 Here’s a little peek of how our Flower Basket of the months are born… well bloom… the soil is the idea, the water is the work, and the sunshine is thread!


    For a monthly series, we like to follow along with what is actually blooming… so far we have the early crocuses, then the daffodils and tulips… it’s always nice to have a theme to guide you, and also for a very practical reason—we then have to find a sample to sketch! It’s a good excuse, if excuse be needed, to buy flowers. Here’s what we snagged this month, just at a local grocery store:


I resisted all the candy, (peeps are my favorite!) and bought this tiny Easter basket this month for some additional inspiration. Now how are we going to fit that huge pot of lilies into that tiny basket?-- it's easy, when you have an artistic license!


I am not actually a big fan of lilies, and Easter, besides the peeps, is not high on my list of favorite holidays, (what's to love about getting up at sunrise on a raw morning-- yes, I know there are morning people out there who will disagree with  me) but I’ve been digitizing them for the Baltimore album borders and they really are lovely flowers when considered just for their shapes. You can change the colors to turn them into any sort of daylily, too. The smell is heavenly. I still wouldn’t get up in the dark, though. 
I took lots of pictures of the lilies-- I always like to have a bud, a partly opened flower, and a bloom, from all sides.

Sometimes I just sketch, but this time I took the photos into Photoshop and cropped out the flowers I like. So I cut and paste, and make larger, make smaller, flip, rotate— Photoshop is really handy that way. You might think we then just press a button to digitize, but these are not "Photostitched"-- if such a program worked, I'd be out of business! 


The leaves are going to be sketched in—there will always be a place for the good old #2s in my studio. These pieces are in a diamond shape, and the leaves will fill our the corners and provide a nice backdrop for the flowers... I love drawing leaves.


In the embroidery software, every shape is lovingly drawn, colored, assigned a stitch type and a stitch angle. It's amazing how many "colors" you can get out of a single thread color, just by changing the angles. The different ways the light hits rayon thread is wonderful. The lilies are a challenge because they are mostly white, and beyond cream there are not a lot of thread colors to use without making them too dark. We used dark greens for the leaves, to contrast with the flowers. Then white, cream, and the palest ever yellow for the blooms, a couple of darker khaki greens for the flower shadows. The fun part was picking the basket colors-- we went all out, bright!


It's good to lay out all of your colors ahead of stitching-- if you don't like them together now, you won't later. Also, you see how easy it is to take the range of lily colors and change them to any colors of your choice-- use a series of dark yellows, orange, and then red and you'd have a Tiger Lily! And if you don't want an Easter basket,  you can change those to shades of brown or tan. 
We love to see you making these designs your own-- coloring outside our lines is definitely encouraged!


Our lily is now stitched-- as quick as it is to write about it, at this point of the process. we may have already logged sixteen hours. Now it needs to be made into a quilt block and mug rug... many hours ahead but most of the heavy labor is done. This point of the design is always a bit of a relief for me-- I did it!


Here you can see our quilt block is finished, and we're going to show the making of the mug rug because it's a bit more colorful. We decided to do something different this time and stitch on a colored background-- white flowers on white fabric is a favorite look of mine, but frowned on in this establishment because it is a BEAR to photograph!

I am thinking pink or purple, but I don't like pink... so it's purple! 


The background gingham is fabric I bought almost twenty years ago to make my toddler daughter and Easter dress... it never got made, sniff, sniff! But I'm glad I saved it because it is perfect to go with my little digitized basket. Write me if you want some-- I still have about two yards left! Here we are, halfway there...


These mug rugs completely stitch in the hoop including the quilting. And now we are finished! All told, a good 4-5 days have elapsed. It's time to make a cup of tea and have a photoshoot. You'd think that looks good enough to swallow after all the hard work... only I like my tea with milk and sugar, but lemon looks so much better, don't you think?
I hope you enjoyed the start to finish "tour"! Spring has now sprung, or at least it's trying hard, and the choice of flowers will become immense! Please comment with your favorite blooms and we will try to stitch ALL OF THEM this summer. Our next series of baskets are going to feature more than one flower. XOX