
Today, we're going to do something unusual for this sewing blog and talk about sewing! First up, is the promised finishing instructions for my Star of Wonder cross stitch pillow. There's lots of tips for sewing with cross stitch. Then, I'm going to show you the Star of Wonder quilt, now on the longarm, and hopefully inspire you to some of your own finishes!

I got the Star of Wonder cross stitch pillow done in about two hours start to finish! This is a great way to finish any pillow, and it makes a nice, useful item if you have enough framed cross stitches filling your walls.
First, decide on a pillow form size. A pillow form is the best purchase you can make for a neat finish-- do not be tempted to stuff your own! They are not expensive-- think Michael's 40% off coupon. The actual covering we are making is removable, so you can just change out your pillow form with the season. (It makes the covers so easy to store flat, as well.) The rule of thumb is-- make your project 2" smaller than the pillow form for a nicely stuffed piece. I just went 1" smaller all around, since this is a smaller size. My pillow form was 12." They only come in certain sizes, so check first!
I pulled fabrics to match the cross stitch-- for once, my dusty old stash did not disappoint. If you ordered the quilt kit, there is plenty of fabric left over to make your pillow. Fat Quarter Shop is always so generous with their fabric kits. If you want to make yours exactly like mine, the measurements are below.
Note that when cutting a cross stitch piece-- make sure you cut along a row of holes on each side, even if your piece isn't perfectly square. (Frequently, cross stitch is NOT square, since your stitches are all on the diagonal.) Give the piece a little tug and a light press to encourage it back to squareness and remember, this is a pillow, so it need not be perfect.
If your piece is seriously out of square, you're probably pulling your crosses too tight-- loosen up on the next one! But all is not lost-- give it a little spray of water, mark a perfect square on a piece of cardboard or foam core board. Then pin it square and let it dry-- i.e.- BLOCK IT!
These are the fabric measurements to cut:

For my creative friends, here is how to measure to make your own pillow out of any cross stitch finish. Grab a piece of graph paper and think of each square as 1/2"-- finished size! Mark out the boundaries of your pillow form size, minus 1-2 inches for a full pillow, as we discussed. Then, measure your cross stitch piece for its finished size. Basically, use the graph paper to draw finished sizes of your pieces-- then, when you have your layout and fabrics, just add 1/2" to each dimension for cutting sizes.
On the graph paper, first draw in your cross stitch. You can center it with four borders, which is the most obvious way, but I wanted a more progressive look and put mine in the corner. Then just sketch in the borders in the order you will piece them. Look for opportunities to add a tiny quilt block or a novelty print border. My square "F" would have been the perfect place for a fussy cut or tiny pieced star.
Now, were going to sew using 1/4" seams. The order is, A to E, then D to F. Attach A/E to D/F. Then add C and finally B. When you sew, sew with the cross stitch piece on TOP. Pick a line of holes in your Aida or a thread in your linen and stitch along it as shown. Always press away from cross stitch, or outward from the pillow center. No open seams in pillows, please. At least not in my house, where it will be abused!


Now we need a backing. Our backing is made of two overlapping pieces. The pieces are folded in half, for strength.

To make it, cut two pieces 16-1/2" x 11-1/2." Fold them in half, starch, and iron. Each piece now has a nice folded edge for a finish. I top stitched 1/4" away from the folded edge from side to side, just for a little extra strength.

If you're making your own pillow, the formula I use is 2/3 of the height of the pillow for each piece. Then you need to double it to fold it in half.
Now, it's final assembly-- we're not turning this pillow inside out-- we're going to bind it, just like a quilt. So wrong sides are together!
First, lay your beautiful pillow front face down. Lay one of the backing pieces on top. The folded edge is at the top in this photo.

Now layer the other backing piece on top of that-- the folded edge is at the bottom of this photo now. Pin all the pieces together and baste all the way around at the 1/8" seam line. Remove the pins.

Cut yourself a 2-1/4" strip of fabric and bind as you would a quilt! I stitched mine by hand at the back-- I actually have a YouTube tutorial with 10,000 views for machine binding. Obviously, it's a skill we all want to speed up the process!
It's forty minutes, but will save you time in the long run. Practice on little mug rugs!
So that's it! I have more finished cross stitches that need FFOing-- making myself sit down and do this instead of always thinking about it proved it doesn't have to take long.

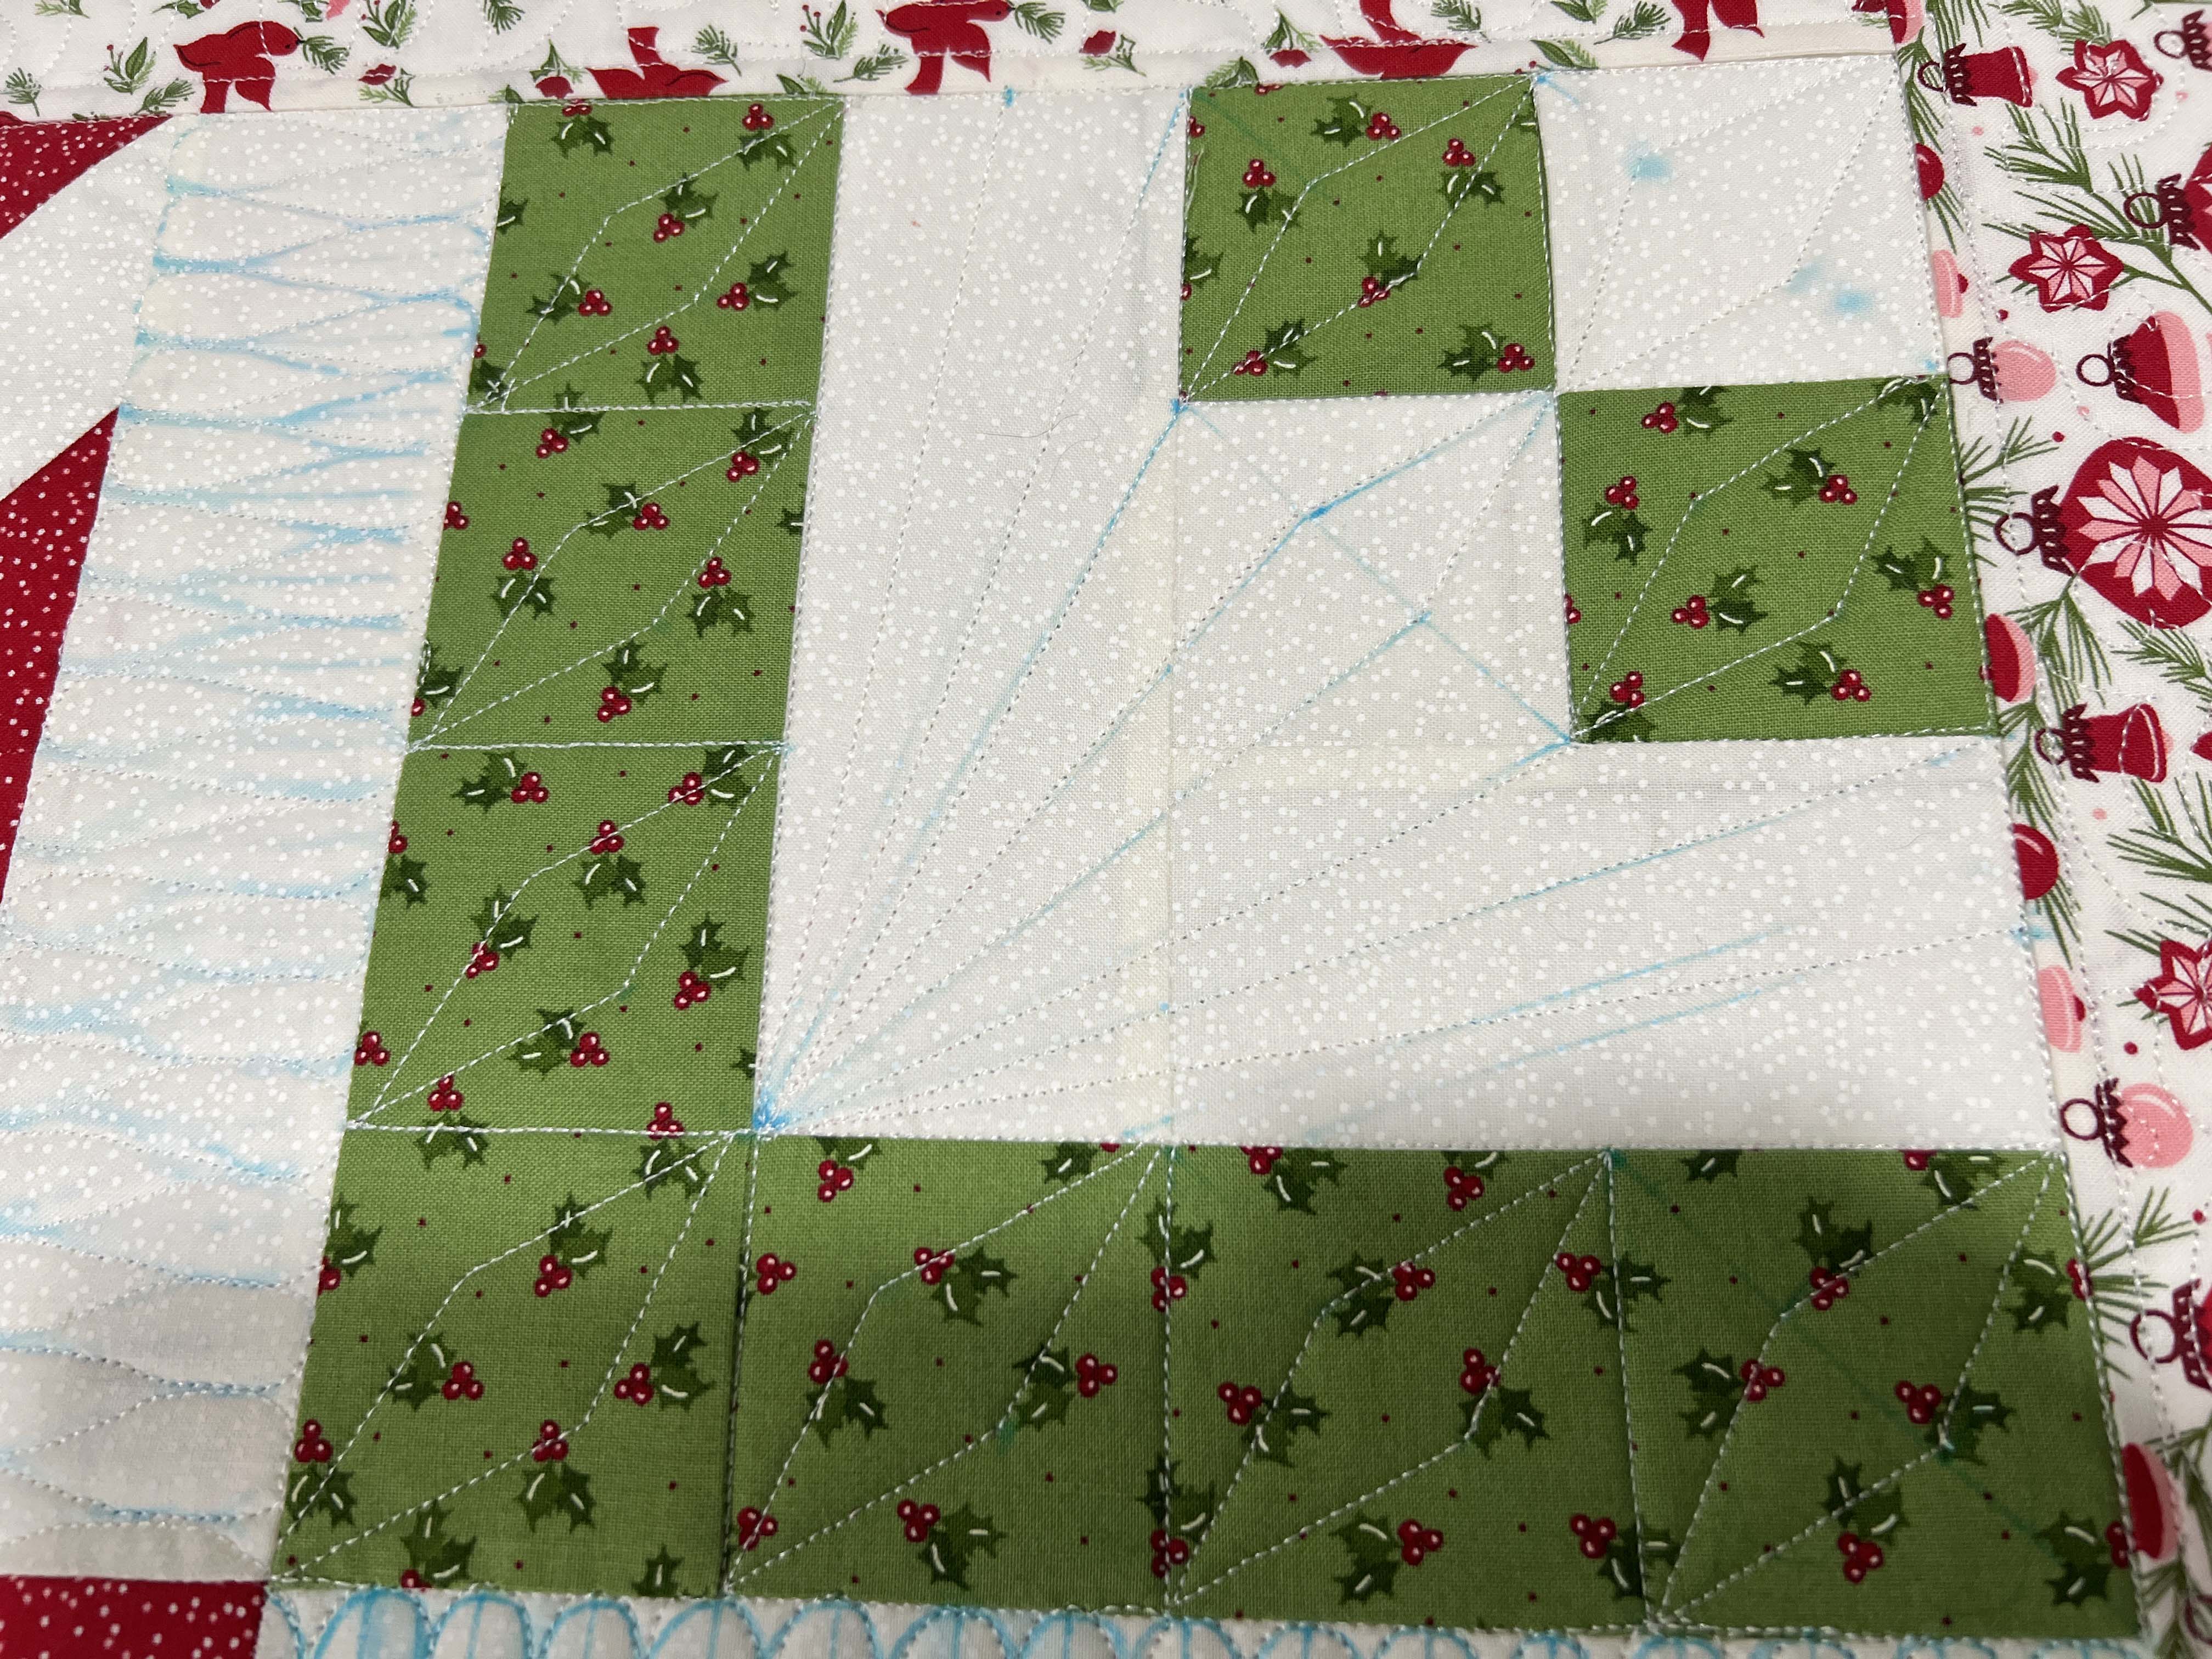
Now for a quick look at my Star of Wonder quilt-- it is on the longarm. If you are a frequent reader, you'll know this thing was a royal pain to get together. Not the Fat Quarter Shop's fault, it's my fault. Since it tortured me, I am now going to repay that favor on the longarm!

My poor longarm sat unassembled for almost two years while I patiently waited for my over the garage studio. I have now vowed I will use it EVERY DAY, even if it's for just a half hour! Since I don't like to practice, my Sew Sampler box finishes over the last months will serve that function!

I have been obsessively watching YouTube videos, primarily of Angela Walters and Natalia Bonner, who have freely shared their expertise-- they are both quite good. Beyond that, I'm using the "think method."

My strong feeling is, practice will never equal working on a real piece. For one thing, when you practice you tend to just quilt all over the place. A real piece has shapes to fill!

What better way to get over the fear of "ruining" my quilts, than to actually ruin them?


You can see I'm not opposed to drawing the whole thing in, but staying on the line is another issue. But when I step back from this-- it actually looks great!
To encourage you, there's always a few uncomfortable seconds when you start the longarm up before you get it "rolling" where bad things can happen-- since quilters love to show their mistakes, if you look closely, it's far from perfect. No picking out is allowed!

I know I'm doing the right thing, because I'm very much enjoying myself-- and who is honestly ever going to look this close?
So I guess that's my final thought-- get over your perfection and just enjoy the process. Ironically, your joy will show through, and with time, you might step back and see something that is PERFECT!
That's it for Star of Wonder-- I will show my finished quilt in a couple of weeks, when all the blue marks are washed out-- lol. And I did treat myself to my "Merit Badge" pin minder for finishing these two projects!

have a wonderful week!
Carol
WOW, WOW, WOW!!! Kudos on your finishes! LOVE the way you did your cross stitch pillow. XOXO Dottie
ReplyDeleteYour cross stitch pillow turned out beautifully and I can't wait to see the finished quilt, it looks great so far. I have not tried free hand with my quilting machine but maybe I need to!
ReplyDeleteYour quilting is beautiful!! ❤️ Here’s my reassuring two cents’ worth: those guidelines will disappear and NO ONE will ever know if you strayed from the lines! And who’s to say you weren’t correcting flaws in the guidelines, anyway?!?
ReplyDeleteThank you for so generously sharing your tips, instructions and experience for those of us just starting out with the sewing part! Your finish is lovely and I may have to shamelessly copy you 😁
ReplyDeleteAppreciated!
ReplyDeleteLovely post!
ReplyDelete