Wednesday, June 24, 2020

Still here...


Yesterday, we happily closed out 12 weeks of our World Tour of Embroidery Stitch-a-long! When we started, I imagined after that length of time, we would all be “home” by the time current events were all on the upswing…


Sorry, not sew much!

Thanks to all who sent me words of encouragement after my last post—some of you brought tears to my eyes with your own trying experiences, making my trials seem easy to bear. And I realized again, no one has to be alone thanks to this wonderful Worldwide Web we share. So, to make a long story short, I'm going to stop whining, put my (fully machine embroidered) cape back on, and provide the world with mental relief in the form of sewing chat. It is my calling-- and the day after the world ends, I promise I will be here blathering on about my endless projects. 


Thanks for being here!


As I said I was putting away my skeleton quilt for now-- too reminiscent of COVID… as I was folding it up, my daughter said simply, “This is going to be a really fun Halloween.” She is feeling better after having been in the hospital with mono and that was the most optimistic thing I have heard in a LONG TIME. I wanted to quiz her—“Why? Why? Why is this Halloween going to be so great?” Not in a skeptical way, but just because she had given me a sip of water in the desert and I wanted more. But I didn’t want to kill the moment and just left it alone. As a result, the skeleton quilt is staying out and I am going to finish it. 


It’s really almost there... I had over a dozen extra eyeballs left over after making it—thankfully, it was not because I can’t count anymore, but there’s one more border around the outside. Easily finished in time for a super fun Halloween!


This is really the project that is currently saving my life. It is Editya Sitar’s Sew in Love BOM. I had these blocks being delivered to me each month about a year ago. They went straight into a closet. I’m not a pink fan, but my sister is, and I had a feeling she’d love it! I’m finding instead of thinking of show quilts right now, I have a dream of making bed quilts for everyone I love—it’s sew much more comforting to me right now. xox

I started this on May 1st—I find this out from my phone which has mostly pictures of sewing and it makes a great diary. I studied the whole book before beginning—there is an applique and a pieced version of the quilt—they are mostly the same except for about twelve blocks. I am making the applique one—I do enjoy a bit of handwork.  There are ten blocks: one a month and you either make 4 or 8 of them. Forty nine blocks in all.


First up were these tiny 3” star blocks—I’m fairly sure this is why I didn’t make this immediately when my first package arrived! Twenty tiny stars... at least there were only four of these! I muffed it up a bit-- can you see how? But I'm going easy on myself with this quilt-- finished will be better than perfect.


That circle background fabric is not my favorite-- apparently, Editya LOVES it because it is everywhere in this quilt. I will give her credit though-- the amount of fabric provided is almost enough to make two of these quilts!

The second month was much easier—again only four of them. The fabrics in this month were super pretty.


Then came an applique block—eight lollipop flowers blocks. Editya encourages fused applique—but to me, that’s cheating. I love the Apliquick method which is turned edge, and works really well with geometric shapes like these. You cut out paper shapes, then turn and glue the edge to them—you don’t have to remove the paper, because it dissolves and softens inside the fabric. It took me about three weeks to work through them—I think I mentioned before I like to get up in the morning and do a little hand sewing with my tea—a very enjoyable part of this quilt for me.


Month four—this is the “Crazy In Love” block—I really do love it! I got these done in 3-4 days.


The next block requires making 8. And each is made with nine snowball blocks. Not my favorite, so it will slow me down a bit. The colors values make it look like an X though and they combine to make a bigger shape in the final layout.


So that’s what’s cooking in my spare time these days. So nice to have something to keep my mind occupied. I will update you as soon as I make more progress! Currently, I have four months done in two months.


My sister's birthday is October 1st. Doable?

Maybe!

Have yourself a wonderful day.

xox
Carol

Sunday, June 7, 2020

Not keeping calm and not stitching on...


When I designed this before Christmas,
 I very little imagined how inappropriate a beautiful, flowery setting would be for this year.


Now 2020 is sure to be featured prominently in the history books along with "1914" and "1941."

On political matters, silence can still be golden right now, 
of that I am convinced.


It was distressing to me last week to see good people tearing each other apart on Instagram, as they forget how much we all agree on. 

So I am currently avoiding social media for the most part, but I feel I at least owe an explanation of my absence and why the monthly programs are a struggle right now. 

In addition to the present crisis, May was a month of personal horrors-- my daughter ended up on the COVID floor of the hospital, with what thankfully turned out to be mono.

Did you notice in my last post all the new projects started? 
LOL--in hindsight, it was a symptom of anxiety. I realized this when I then started wanting to throw them all out-- 
stress is killing creativity right now.

This is a cute Halloween quilt I was working on, almost finished--


I started it last year. My daughter and I have a "thing" with skulls--
that is-- we HATE them!!

So every time we see one on an article of clothing or whatnot adorned with skulls, we say-- "Oh! Isn't that so cute!"


When I saw this pattern, I knew I had to make it for her. (The fabrics ARE really cute--not scary at all.)


Thinking of this hanging in her apartment in NYC this year on Halloween was giving me so much pleasure as I stitched along-- then along comes COVID, my dear daughter's life has been totally disrupted as she now lives at home. Worst of all, the whole project has a acquired a sinister feel...


So that now resides unfinished in a closet-- 
not to be taken out again anytime soon.

Then, you may have seen in my last post, I was starting this new table runner for Fourth of July-- the fabrics are just gorgeous and I was so excited to make it-- envisioning the first family gathering in ages, outdoors on the deck, all my loved ones spilling BBQ sauce on a gorgeous table runner...


Then last week happened, and I'm not really feeling it.


Finally, I decided to start my "Dessert Sampler Quilt."
I've had this beautiful kit in my closet for two years--


Can Dessert ever lose its appeal with me?

Apparently it can, because I can't even finish the first block. This photo is a metaphor for my mental health right now. I think there is too much time, when sewing, for brooding to occur.
My husband bought me wonderful new headphones-- but loud music hasn't drowned out negative thoughts, either!


I am struggling right now--
thinking of how to become a better person, a better wife, a better mom, a better friend, a better citizen...

“Be kind, for everyone is fighting a hard battle”.

Please know that my silence isn't violence-- 

You are welcome here with opens arms.

Your struggles are mine.


Just need a little time for processing. 

xox
Carol


Monday, May 18, 2020

Charm Quilty Pleasures...

  So there's always a bit of guilt when an artist resorts to making a pattern-- or worse yet, a kit! I have learned to accept that after the brain drain of working on embroidery designs all day, there's nothing that helps me recover better than mindlessly chain piecing half square triangles at night!


I am particularly fond of "charm packs"-- these are the little packs of 40 five inch squares of one fabric line you see in the stores. And there are plenty of books with plenty of patterns to show what to do with them. The pattern above is "Dulcinea"-- it's a "Schnibbles Pattern" and I bought it not really knowing what it was initially. The fabric is Brenda Riddle's "Caroline."

I enjoyed making it so much, I inevitably googled "Schnibbles." 
The Schnibbles patterns are no longer in print, but you can buy them as singles second-hand on Etsy or Ebay and I was also able to snag two books second-hand off Amazon.


 Usually there might be only one pattern I really would make in a book, but these have several.. I highly recommend them. If you want a bigger quilt, you could also buy the 10" layer cakes and the patterns are written for both sizes. Just think-- it's really the same amount of sewing! I haven't tried the larger size ones yet, but I feel it coming.


So this one was the first one I made from the book, called "Picnic," and the fabric was Fig Tree Quilts "Ella and Ollie." Again-- I totally enjoyed it-- the instructions are well written, you can just do it little by little-- they get done! It's on my longarm right now-- yes, the Innova was initially looking like a colossal waste of money initially as it sat, alone, in it's own room-- is now, due to circumstance, looking like the smartest thing I ever did. PLENTY OF TIME FOR IT...


And now I need a new project so I ordered some more charm packs from Fat Quarter Shop! This is "Mackinac Island" fabric from Minick and Simpson-- they always come out with these gorgeous red, white, and blue collections-- so perfect for patriotic pieces. I am hoping to have the "Lincoln" quilt with the stars and bars as a table runner by Fourth of July.


I give away almost everything I make. For a schnibbles pattern, you need mostly TWO charm packs-- they are usually around $10-- and then I already have batting, and I can usually piece together a backing from my stash-- so you have a fabulous gift for $20.
Depending on the pattern, one charm pack and about a yard of matching background fabric is sometimes better-- again, a $20 gift.

But I have a feeling "LINCOLN" may not be leaving this house...


And here's another few charm packs I bought-- I mean, why pay shipping for just one collection!
This is Abby Rose from Robin Pickens and I picked up the Schibble pattern "Clover" from Etsy. I already looked it over, and it is assemble in LONG. ROWS. which is not something I typically enjoy but I love the pattern.


"Catalina" and "Rosewood" I am not sure what I am doing with-- but here's another charm pack book still available...


 Again, it has more than one design I like-- my favorite is called Snowflake-- they look more like flowers to me in those colors, so it could be either a summer or winter quilt.


I have three machine embroidery patterns 
in the store for charm packs.


Look what our clever friend, Jacqueline from Arizona, 
is making with her scraps! It's always such a treat to get emails like this.


So what could be better than charm packs--
 embroidered charm packs!

Hope we've inspired you to pull out some fabric today.

xox
Carol

Wednesday, May 6, 2020

Patience, patience!


Yesterday I had the framework of the May cottage of the Month finished... I had made a list of  potential monthly themes in early January to see if I could think of enough, and also to try to make them correspond with the season--
so April was HOPE because we are hoping for spring, and May was PATIENCE, because we have planted our seeds and are waiting for them to sprout. Little did I know they would be far more appropriate than I thought, as we are hopefully and patiently (or not so much) waiting for this crisis to pass.


Originally, I was thinking of the "Fruits of the Spirit" cottages when I started this, but there are only nine of them, and some of them I don't agree with... for instance, there was no "self-control" exhibited when I decided to run three stitch-a-longs at once. (Stitches of the Sea, Cottage of the Month, World Tour of Embroidery) or frequently none embraced when visiting the fatquartershop.com. Does anyone else have that Sunday School song stuck in their head, though?

The Fruit of the spirit is love, joy, peace.... 
patience, kindness, goodness.
The Fruit of the Spirit is 
faithfulness, gentleness, and self-control.
If you live by the Spirit let us keep in step, 
keep in step with the Spirit...

And just note that "self-control" is LAST anyway!

So here we are with the framework of the house:


Then, it's time to fill all the leftover spaces
to the brim with "cute stuff."


It's hard to make a dog in 15 cross stitch blocks... I checked with my daughter to make sure my new elements looked okay and she correctly named a swing, birds, clouds, and a weathervane. She called the hanging baskets "dream catchers" but I can live with that.


Yesterday, the Scottie dog was running rampant all over the design. I am proud to say I did not lose PATIENCE but instead made him a friend and a doghouse and they both settled into good spots.

When I started with Fairy Frost fabric for the first wintery cottage, it did cross my mind that it might not be appropriate for summer cottages, but now I'm thinking instead of frost that sparkle is now a dewy spring morning-- I still love it!


 The cherry blossoms are out!


Has anyone notice that each design has a large backstitched element? This one has a cherry blossom... at first, I was just trying to break up the border and fill some extra space, but now they are one of my favorite parts of the design! I was thinking of just doing a set of twelve "Unusual Elements" as a set at the end of the year.


We are almost halfway through the series and that has been plenty of time to dream up sashing ideas... I'm thinking of climbing florals with maybe a bird tucked in here or there. For the cornerstones, maybe suns? or maybe the birds go there? They will be fun to draw and I'm hoping to get them done over the summer. Think "happy."


That leaves the outer border... I was really thinking of this as a "virtue village," and I was thinking of the Bible verse, "whatever things are true, whatever things are honorable, whatever things are just, whatever things are pure, whatever things are lovely, whatever things are of good report; if there is any virtue, and if there is any praise, think on these things." So maybe a shortened version of that around the edges, or if you are totally over machine embroidered cross stitch, keep your eye out for a lavish floral print for your borders as the year progresses. Your thoughts are welcome.

I do like those verses though-- so appropriate for any faith--but the number of hoopings required might test both my patience and my self-control at the same time.

May Cottages of the Month out by the end of the week...


Happy stitching everyone!

xox
Carol

Friday, May 1, 2020

The first day of the rest of the year...

MY DESIGN WALL 5/1/20

It's May 1st-- we made it through one of the crazeist months of my lifetime. SO... I went back and read my blog post for March 16th-- that is when the initial realization set in that things were about to change. It's good to know that since then, we have been able to flatten the curve substantially, eveyone who needed a ventilator had one, we didn't completely spiral out of control, and some states are even starting to open back up again.

BIG SUNFLOWER BLOCK

At the same time, normalcy is a long way off. Until we have a vaccine, it still seems risky to leave the house if you don't have to. I think masks will be a "thing" for a year or more. Will I be standing in line, 6ft apart, waiting to go into Michael's? How will I get a haircut? What will dining in a restaurant be like? When can I go to my friends' homes? So as much as I look forward to the day my state stops the stay-at-home order (currently it's May 15th), the realization has set in that life is going to have limits for a while.

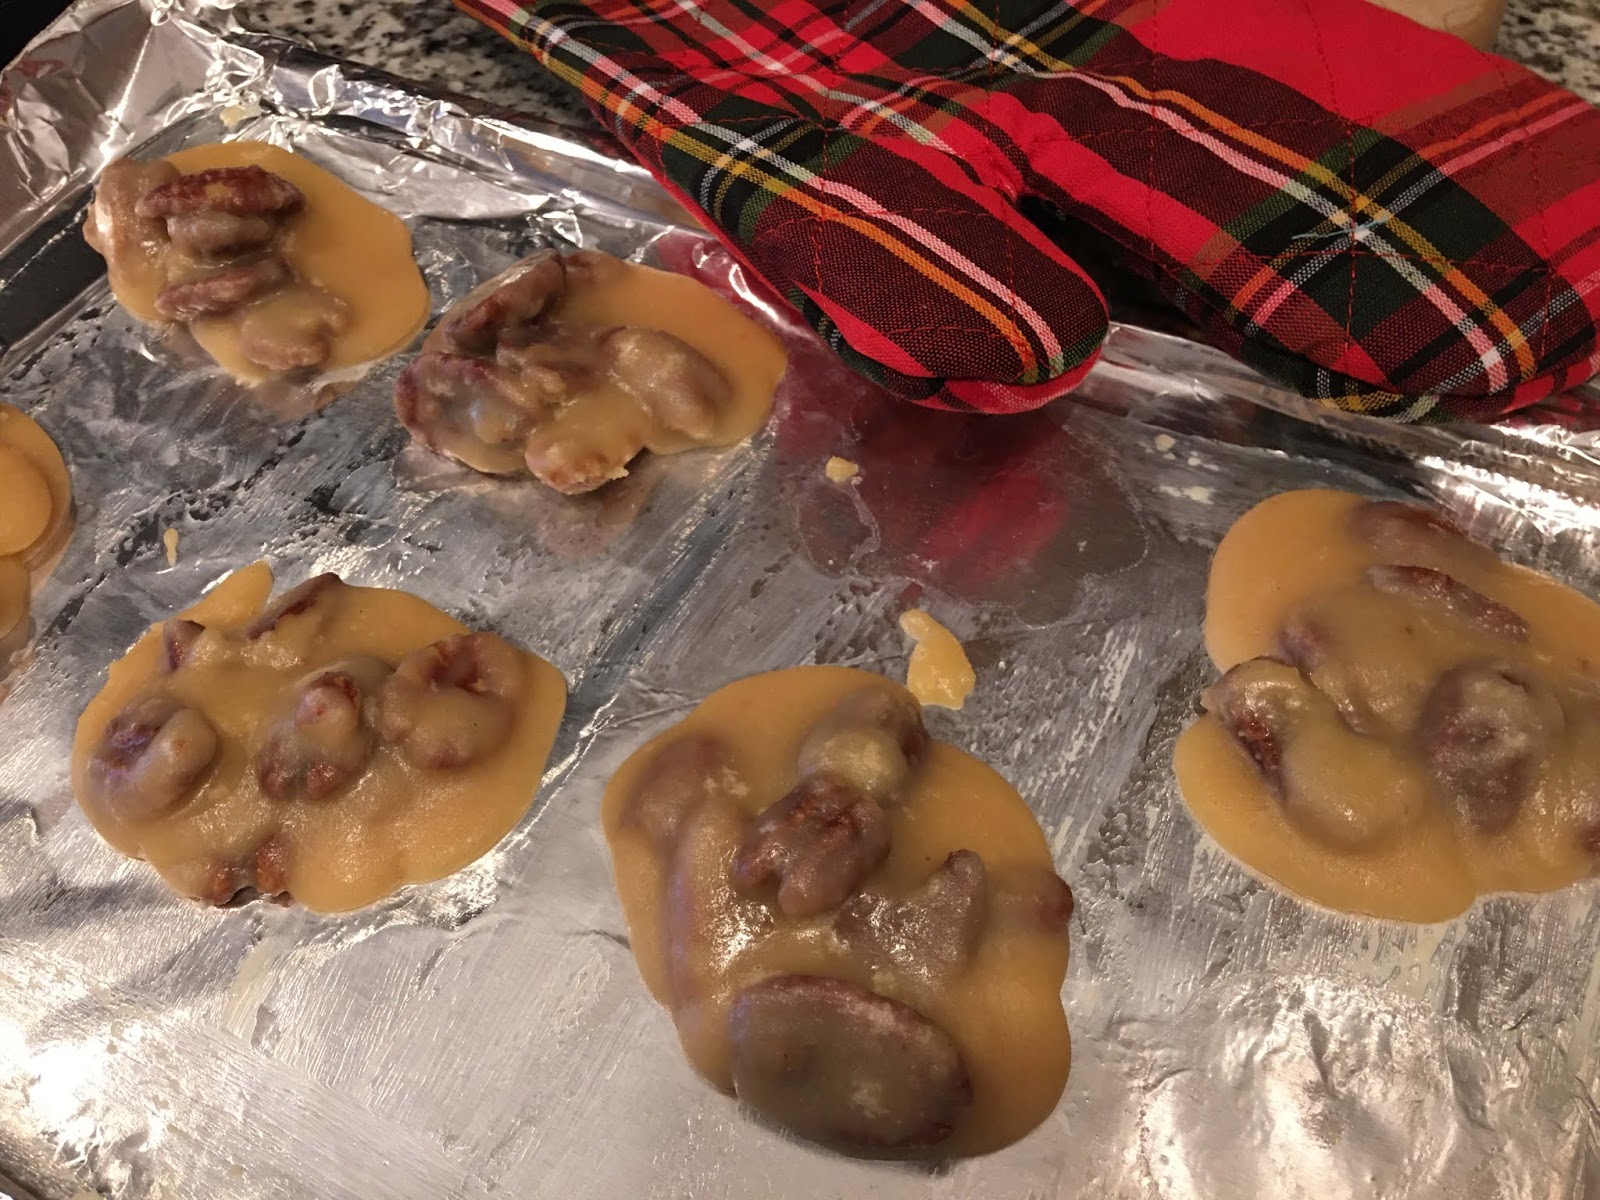
PECAN PRALINES

I have really settled in here, and I'm trying to keep a good perspective. I don't have any risk factors. I understand that the death rate is probably much lower than initially thought, but I really don't want to suffer through a bad virus. Simpler joys-- like taking a walk with my husband, baking at home, and of course, sewing, have become enough for me for now. I do firmly believe we will get through this in a matter of some long months. Most importantly, I don't think it will fundamentally change who we are.

DULCINEA TABLE RUNNER

Fast forwarding to the end of the crisis, I'm thinking of what I will wish I had done during this "quiet" time. I can certainly check off the box of getting a lot of sewing done-- if you follow my daily Facebook posts, it's been hugely productive! The pictures here are mostly of things I did in April. I'd also love to work again on my scrapbooks-- they brought me so much joy when my kids were growing up, and are a source of comfort to me now. I'd love write a short story or two-- did you know that in your imagination you can go anywhere you want?! I'd love to jot down some memoirs-- not something all about me, but as a tribute to some amazing people and places I've experienced in life. I'd also love to get my house a bit more in order-- usually I'm not a fan of housework, but to tell you the truth, sorting through the things I have collected over the years has given me a good deal of pleasure since my nest emptied.

MY NEXT "GUILTY PLEASURE"

So that's the plan! All of the running around we used to do has pretty much ended. We have the long wished for the GIFT OF TIME. I sure hope to use mine wisely. It's kind of exciting. Let's see what happens!

xox
Carol


Sunday, April 26, 2020

The Saga of Machine Embroidered Quilting

This is the story of a two-year battle to stitched digitized quilting designs successfully on my Flower of the Month quilt from 2017. 

It is long-winded and boring, except to a tiny minority of deranged proselytes in the cult of machine embroidery. (You know who you are.) There are very few pretty pictures. They are stern admonitions as well as high-flying experimentation that may result in addictive behavior.  Finally, you may enter an altered state of creative heights that may incur decisions damaging to your embroidery machine as well as quilts that you have spent an age on.

You have been warned.

So I teased my pictures of the perfect sashing stitchout on Facebook, and as visual artists, many of you didn't read and thought I finally got my magnahoop to work. Not so.


It was back to my trusty hoop. But before I get into that, I just want to say that the magnahoop really excelled, more so than my final method,  under certain conditions. Many of you seemed more interested to learn about that-- so I'll briefly describe it.

The MagnaHoop is sold by Designs in Machine Embroidery's Eileen Roche. (It's a magazine, and she has done a lot for this craft, so this purchase is worth the price of admission.)
This is the Magnahoop base-- 
you can start by just attaching it to your machine.


Then just lay your piece over it--
like, exactly where you want, even. 


You can see I put my needle down right on a mark I made, and was able to perfectly line the edge of my quilt up with hoop for straightness.


Then, just slide that magnetic top down under the needle-- these are SUPER strong magnets, and the set came with warnings, but at no time did I actually feel like I was going to lose a finger.

Then just stitch!

So if you don't like hooping-- boy, is this ever for you!
The problem is, when I tried to do it more in the center of the quilt, it slipped very badly. You can see above, the magna hoop at least has that one edge to hold on tight-- I can also successfully kind of hold the quilt on the other side to take the weight off of it while it stitches. In the middle, it is just too thick for the hoop to grab tightly. And I would have to kind of hold all four sides at once, with a mere two hands,  to "help it."

I had to rip out at least three stitchings-- never again.

I'm not ready to throw it out-- I did three side hoopings in ten minutes-- my new method take about a half hour each. And this week, I'm going to try stitching my "World Tour of Embroidery" design on it, just to give it a chance at a more normal embroidery situation, and I will let you know how that goes.

So now that the little flower "cornerstones" are done, it's time to move on to the larger sashings. They have to be more precisely aligned and have MORE tiny stitches to pick out if unsuccessful, so I needed a new way.


The design is 1-1/2" x 6." The first one I did (top) was "crazy talk." It has way too much detail and you can see the spine of the feathers is stitching too many times. Thank goodness I realized it need to be cleaned up before I might be in a situation of picking it out. (I'm either too lazy, or way too overconfident, to test it.)

Now to describe my "hoopless" technique-- that is what they call it. It sounds great, like magic, doesn't it? 
But you do have to use a hoop-- just not hoop your piece. 

I hooped two pieces of stabilizer. 
My first color change is a guideline that is just stitched on the stabilizer. 

(Obviously I have a big advantage to be able to digitize this-- but most embroidery machines have a basting feature--so you would use it. You would then just draw an X in the middle of the resulting rectangle to find the center of your stabilizer. The directions for your OWN design will be in italic in parantheses from here on.) 


Next, I marked the design on my quilt. I just had to mark the short ends because the long sides occur where my stitched line are. You can see the lines below-- my favorite marker is the purple air erasable one, but I do also use the blue ones if I need the markings to last longer. 

(So if you have your own design and have stitched a basting line with the features of your machine, you would measure your design, and then draw the rectangle for it on your stabilizer, using the X you drew as the center of that new rectangle.)


Now use pins to secure your quilt to the guidelines on the stabilizer. This takes time and patience. One of those we have in plentiful supply right now-- the other is up to you!

Pin through a corner of the marked design on your quilt-- then insert the pin through the corresponding corner on the stabilizer. Don't secure the pins. Just leave them sticking through. Yes, I pricked myself a thousand times. Remind yourself, it is all for the beauty of the art. Do all four corners. Gradually, you will be able to get the quilt flat on the stabilizer, your pins will be sticking through straight, not angled, in all four corners, and you will be confident that the quilt is completely aligned with the guideline below it. I got better as I went along-- you will, too.

Once you are at this point, you will now put securing pins through your quilt and stabilizer while leaving those corner pins sticking in. These need to by AWAY from the stitched guideline-- so that is, in the very center of your quilted area, or very far away from the outside of it. I did three pins in the middle and two outside-- it was VERY secure. (See below.) You can now remove the corner pins.

(For your own design, you would move to a regular sewing machine, and baste your quilt to your stabilizer.  Yes, this is in the hoop and the hoop needs to be carefully manuevered under the presser foot- you can do this. The basting doesn't have to be prefectly square or 1/8" away, it can be anywhere outside of your quilted area-- it is just holding your quilt to the hoop-- it is not a guideline of any kind.)

At this point, we need a disclaimer-- you can see there is potential to sew over pins here! You need to know exactly where your embroidery machine is going on this second color change to avoid them. And once my color change finishes, my machine automatically moves to the next start point-- so I make sure I STOP it before the very end of my digitized guidelines to catch it before that happens. You could rip your quilt or damage your machine if the presser foot hits a pin. 
Don't try this at home if you are not confident!

I carefully reattached the hoop to my machine and ran the second guideline--it stitches 1/8" outside of the other guideline-- you can see it in pink below. It's helpful to do it in a little bit different color because you'll be picking it out.


Remove the hoop from the machine and take out all of the pins. The quilt is now secure with the stabilizer.

So now we can go ahead and run the quilting, right?

WRONG!

Only if you want your quilt secured to 2 layers of stabilizer with 1,000 microstitches!

So this is the innovation, I credit myself with-- I did think it up myself, but that's not saying that no one else ever did.

Flip the hoop over and carefully cut out the stabilizer between the first stitched guideline, and the second basting line. Remember-- the pink one is holding your quilt to the stabilizer and thus, the hoop, so leave it intact. 

Load the quilting thread in your bobbin and again attach the hoop. Now you can run your quilting color change and here are the final results, front and back:


All that is left to do is unhoop and remove the basting.

The results are impeccable, and to me, well worth the patience and 1/2 hour required for each. I have 36 of these to do in all, and just by doing a couple of them a day, the journey of 1,000 miles will be complete in less than a month.

So I'd love to hear your comments below. Even if this is something you'd never want to do, maybe I've inspired you to pick up an older project, try something new, become more confident in your skills, or think of creative ways to use designs you already have. Maybe you even have an idea for me to do this better.

The sky is the limit. It's in your grasp.

And finally, a pretty picture to thank you for sticking with it-- because the back of this is as truly beautiful as the front.


I won't have to be just imagining 
those pretty quilted sashings after all.


xox
Carol